Author Archives: Biswajeet

About Biswajeet

Biswajeet is my Name, Success is my Aim and Challenge is my Game. Risk & Riding is my Passion and Hard Work is my Occupation. Love is my Friend, Perfection is my Habit and Smartness is my Style. Smiling is my Hobby, Politeness is my Policy and Confidence is my Power.

Salesforce Lightning Tree

lightning:tree component displays visualization of a structural hierarchy, such as a sitemap for a website or a role hierarchy in an organization. Items are displayed as hyperlinks and items in the hierarchy can be nested. Items with nested items are also known as branches.

To create a tree, we have to pass in an array of key-value pairs to the items attribute.
Below are the keys:

  • disabled (Boolean): Specifies whether a branch is disabled. A disabled branch can’t be expanded. The default is false.
  • expanded (Boolean): Specifies whether a branch is expanded. An expanded branch displays its nested items visually. The default is false.
  • href (String): The URL of the link.
  • name (String): The unique name for the item for the onselect event handler to return the tree item that was clicked.
  • items (Object): Nested items as an array of key-value pairs.
  • label (String): Required. The title and label for the hyperlink.

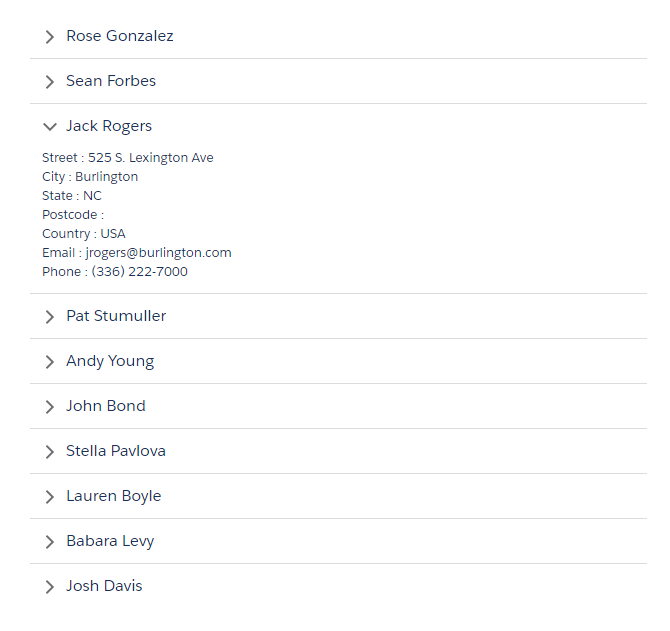
Here is an example of Lightning Tree with list of accounts and respective contacts.

Apex Controller:

public class TreeAuraController {
    
    @AuraEnabled
    public static List<item> getAccountTree(){
        
        List<item> items = new List<item>();
        List<Account> acctList = new List<Account>();
        //get list of accounts and respective contacts
        acctList = [SELECT Id, Name, (SELECT Id, Name From Contacts) From Account LIMIT 10];
        for(Account acc: acctList){
            
            //get contacts of current account record
            List<item> conitems = new List<item>();
            for(Contact c: acc.Contacts){
                //add contact items
                item conitem = new item(c.Name, String.valueOf(c.Id), false, null);
                conitems.add(conitem);
            }
            
            //add account items
            item accitem = new item(acc.Name, String.valueOf(acc.Id), false, conitems);
            items.add(accitem);
        }
        return items;
    }
    
    //Item Wrapper Class
    public class item{
        @AuraEnabled
        public String label {get; set;}
        @AuraEnabled
        public String name {get; set;}
        @AuraEnabled
        public Boolean expanded {get; set;}
        @AuraEnabled
        public List<item> items {get; set;}
        
        public item(String label, String name, Boolean expanded, List<item> items){
            this.label = label;
            this.name = name;
            this.expanded = expanded;
            this.items = items;
        }
    }
}

Lightning Component:

<!--Tree.cmp-->
<aura:component controller="TreeAuraController">
    <aura:handler name="init" value="{!this}" action="{!c.doInit}"/>
    <aura:attribute name="items" type="Object"/>
    <!--Lightning Tree-->
    <div class="slds-m-around_xx-large">
        <lightning:tree items="{!v.items}" onselect="{!c.handleSelect}" header="Account and Contacts"/>
    </div>
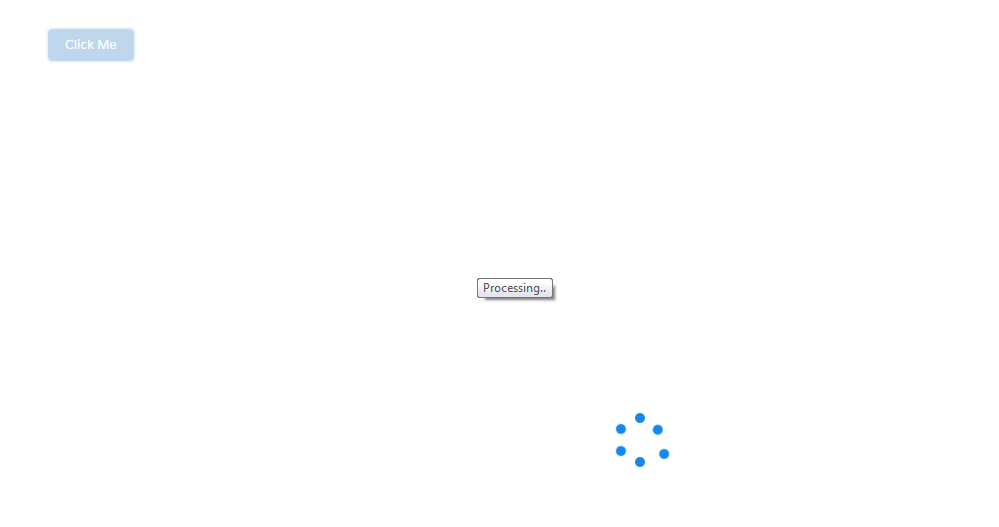
    <!--Lightning Spinner-->
    <div>
        <lightning:spinner alternativeText="Processing.." title="Processing.." aura:id="spnr" variant="brand" size="large" />
    </div>
</aura:component>

Lightning Component JS Controller:

({
    doInit: function (component, event, helper) {
        var spinner = component.find("spnr");
        var action = component.get('c.getAccountTree');
        action.setCallback(this, function(response){
            var state = response.getState();
            if(state === 'SUCCESS'){
                //get account and respective contact list, and initialize with items
                component.set('v.items', response.getReturnValue());
                //hide spinner after getting data
                $A.util.toggleClass(spinner, "slds-hide");
            }else{
                $A.util.toggleClass(spinner, "slds-hide");
                alert('ERROR');
            }
        });
        $A.enqueueAction(action);
    },
    handleSelect: function (cmp, event, helper) {
        //return name of selected tree item
        var selectedName = event.getParam('name');
        alert("Selected Name: " + selectedName);
    }
})

Lightning Test App:

<!--Test.app-->
<aura:application extends="force:slds">
    <c:Tree />
</aura:application>

Output:

Salesforce Lightning Spinner

lightning:spinner displays an animated spinner image to indicate that a feature is loading. This component can be used when retrieving data or anytime an operation doesn’t immediately complete.

Here is an example to show the lightning:spinner on click of a button.

Apex Controller:

public class SampleAuraController {
    
    @AuraEnabled
    public static String getMessage() {
        return 'Hello World!!';
    }
}

Lightning Component:

<!--Sample.cmp--> 
<aura:component controller="SampleAuraController" implements="flexipage:availableForAllPageTypes,force:appHostable">
    <!--Component Start-->
    <div class="slds-m-around_xx-large">
        <lightning:button label="Click Me" variant="brand" onclick="{!c.handleClick}"/>
        <lightning:spinner aura:id="mySpinner" alternativeText="Processing.." title="Processing.." variant="brand" size="large" class="slds-hide"/>
    </div>
    <!--Component End-->
</aura:component>

Lightning Component JS Controller:

({
    handleClick: function (component, event, helper) {
        helper.showSpinner(component);
        var action = component.get('c.getMessage');
        action.setCallback(this,function(response){
            var state = response.getState();
            if (state === "SUCCESS") {
                helper.hideSpinner(component);
            }
        });
        $A.enqueueAction(action);
    }
})

Lightning Component JS Helper:

({
    showSpinner: function (component, event, helper) {
        var spinner = component.find("mySpinner");
        $A.util.removeClass(spinner, "slds-hide");
    },
    
    hideSpinner: function (component, event, helper) {
        var spinner = component.find("mySpinner");
        $A.util.addClass(spinner, "slds-hide");
    }
})

Output:

We can use lightning:spinner as conditionally, using aura:if or the Lightning Design System utility classes to show or hide the spinner.

The variant attribute changes the appearance of the spinner. If you set variant=”brand”, the spinner matches the Lightning Design System brand color. Setting variant=”inverse” displays a white spinner. The default spinner color is dark blue.

Salesforce Lightning Accordion

lightning:accordion component groups related content in a single container. Only one accordion section is expanded at a time. When you select a section, it’s expanded or collapsed. Each section can hold one or more Lightning components.

Here is an example of Lightning Accordion. I’m retrieving a list of contacts from Salesforce and populating into the Lightning Accordion.

Apex Controller:

public class AccordionAuraController {
    @AuraEnabled
    public static List<Contact> getContacts(){
        List<Contact> contactList = new List<Contact>();
        contactList = [SELECT Id, Name, Email, Phone, MailingStreet, MailingCity, MailingState, MailingPostalCode, MailingCountry From Contact LIMIT 10];
        return contactList;
    }
}

Lightning Component:

<!--Accordion.cmp-->
<aura:component controller="AccordionAuraController">
    <aura:handler name="init" value="{!this}" action="{!c.doInit}"/>
    <aura:attribute name="conList" type="List"/>
    <div class="slds-m-around_xx-large">
        <lightning:accordion>
            <aura:iteration items="{!v.conList}" var="con">
                <lightning:accordionSection name="{!con.name}" label="{!con.Name}">
                    <aura:set attribute="body">
                        <p>Street : {!con.MailingStreet}</p>
                        <p>City : {!con.MailingCity}</p>
                        <p>State : {!con.MailingState}</p>
                        <p>Postcode : {!con.MailingPostalcode}</p>
                        <p>Country : {!con.MailingCountry}</p>
                        <p>Email : {!con.Email}</p>
                        <p>Phone : {!con.Phone}</p>
                    </aura:set>
                </lightning:accordionSection>
            </aura:iteration>
        </lightning:accordion>
    </div>
</aura:component>

Lightning Component JS Controller:

({    
    doInit: function(component){
        var action = component.get('c.getContacts');
        action.setCallback(this, function(response){
            var state = response.getState();
            if(state === 'SUCCESS' && component.isValid()){
                //get contact list
                component.set('v.conList', response.getReturnValue());
            }else{
                alert('ERROR');
            }
        });
        $A.enqueueAction(action);
    }
})

Lightning Test App:

<!--Test.app-->
<aura:application extends="force:slds">
    <c:Accordion />
</aura:application>

Output:

Note: The first section in the lightning:accordion is expanded by default. To change the default, use the activeSectionName attribute in lightning:accordion component. This attribute is case-sensitive. If two or more sections use the same name and that name is also specified as the activeSectionName, the first section is expanded by default.

Pass Values from Start Chat Button to Pre-Chat Form in Salesforce Live Agent

In Live Agent, sometimes we need to pass some values from the page, where Start Chat button is located, to pre-chat form.

To achieve this, liveagent.addCustomDetail() function can be used to set the values. On pre-chat form page, liveagent.details.preChatInit() function can be used to access those details.

Here is the sample code to pass values from chat button to pre-chat form. In below example I’m passing “FirstName” and “LastName” values to pre-chat form.

Start Chat Button Code:

<div>
    <img class="chatbutton" id="liveagent_button_online_5737F000000Tdus" style="display: none; border: 0px none; cursor: pointer" onclick="liveagent.startChat('5737F000000Tdus')" src="https://contactcenters-developer-edition.ap5.force.com/chat/resource/1510984682000/ChatOnline" />
    <img class="chatbutton" id="liveagent_button_offline_5737F000000Tdus" style="display: none; border: 0px none; " src="https://contactcenters-developer-edition.ap5.force.com/chat/resource/1510983523000/ChatOffline" />
</div>
<script type="text/javascript">
    if (!window._laq) {
        window._laq = [];
    }
    window._laq.push(function() {
        liveagent.showWhenOnline('5737F000000Tdus', document.getElementById('liveagent_button_online_5737F000000Tdus'));
        liveagent.showWhenOffline('5737F000000Tdus', document.getElementById('liveagent_button_offline_5737F000000Tdus'));
    });
</script>

<script type='text/javascript' src='https://c.la1-c1-ukb.salesforceliveagent.com/content/g/js/41.0/deployment.js'></script>
<script type='text/javascript'>
    liveagent.init('https://d.la1-c1-ukb.salesforceliveagent.com/chat', '5727F000000TijS', '00D7F000003EL75');//Set First Name
	//Set First Name
    liveagent.addCustomDetail('FirstName', 'Biswajeet');
	//Set Last Name
    liveagent.addCustomDetail('LastName', 'Samal');
    liveagent.setName('Biswajeet');
</script>

Pre-Chat Form Page:

    <script type='text/javascript' src='https://d.la1-c1-ukb.salesforceliveagent.com/content/g/js/36.0/prechat.js'></script>
    <script type="text/javascript">
        //Get Custom Details data
        function ChatCallBack(Object) {
            for (var i = 0; i < Object.customDetails.length; i++) {
                
                if (Object.customDetails[i].label == 'FirstName') {
                    //Get First Name
                    console.log(Object.customDetails[i].value);
                }
                if (Object.customDetails[i].label == 'LastName') {
                    //Get Last Name
                    console.log(Object.customDetails[i].value);
                }
            }
        };
        liveagent.details.preChatInit('https://d.la1-c1-ukb.salesforceliveagent.com/chat', 'ChatCallBack');
    </script>

Output:

Salesforce Live Agent Error : Prechat API is not enabled by the specified deployment

In Live Agent, sometimes we need to pass some values from the page, where Start Chat button is located, to Pre-chat form.

To achieve this, we use liveagent.addCustomDetail() function to set the values. On Pre-chat form page, we use prechat.js and liveagent.details.preChatInit() function to access those details.

But if the “Allow Access to Pre-Chat API” in deployment is not enable, then we will face “Prechat API is not enabled by the specified deployment” JavaScript error.

Follow below steps to enable it.

Go to Setup || Customize || Live Agent || Deployments || Edit or Create your Deployment || Enable “Allow Access to Pre-Chat API” || Save