Tag Archives: Lightning

Get Record Id From lightning:recordeditform in onsuccess Event

Sometimes we can have a requirement to get record Id in onsuccess event of lightning:recordeditform. In below example, I’m creating “Lead” object record using lightning:recordeditform and after successfully saving the record, getting the record Id in onsuccess event.

Lightning Component:

<!--Sample.cmp--> 
<aura:component implements="flexipage:availableForAllPageTypes,force:appHostable">
    
    <!--Component--> 
    <div class="slds-m-around--xx-large">
        <lightning:card title="Lead" iconName="standard:lead" class="slds-p-around_medium">
            <lightning:recordEditForm aura:id="leadCreateForm" objectApiName="Lead" onsuccess="{!c.handleOnSuccess}">
                <lightning:messages />
                
                <div class="slds-grid">
                    <div class="slds-col slds-size_1-of-2 slds-p-around_medium">
                        <lightning:inputField fieldName="FirstName"></lightning:inputField>
                    </div>
                    <div class="slds-col slds-size_1-of-2 slds-p-around_medium">
                        <lightning:inputField fieldName="LastName"></lightning:inputField>
                    </div>
                </div>
                
                <div class="slds-grid">
                    <div class="slds-col slds-size_1-of-2 slds-p-around_medium">
                        <lightning:inputField fieldName="Email"></lightning:inputField>
                    </div>
                    <div class="slds-col slds-size_1-of-2 slds-p-around_medium">
                        <lightning:inputField fieldName="Phone"></lightning:inputField>
                    </div>
                </div>
                
                <div class="slds-grid">
                    <div class="slds-col slds-size_1-of-2 slds-p-around_medium">
                        <lightning:inputField fieldName="Company"></lightning:inputField>
                    </div>
                </div>
                
                <lightning:button type="submit" label="Save" variant="brand"/>
            </lightning:recordEditForm>
        </lightning:card>
    </div>
</aura:component>

Lightning JS Controller:

({
    handleOnSuccess : function(component, event, helper) {
        var params = event.getParams(); //get event params
        var recordId = params.response.id; //get record id
        console.log('Record Id - ' + recordId); 
    }
})

Documentation in Salesforce Lightning Component Bundle

Component documentation helps others understand and use your components. Here is a sample example of Lightning Component Documentation.

Sample Component:

<!--Sample.cmp--> 
<aura:component implements="flexipage:availableForAllPageTypes" access="global">
    <strong>Sample Component</strong>
</aura:component>

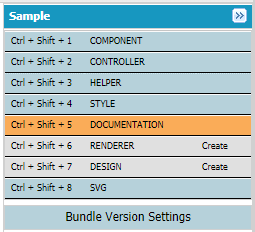
To create documentation of above component, click DOCUMENTATION in the component sidebar of the Developer Console. Hereaura:description is to show the description of the component and aura:example is to show look and feel of the component.

<aura:documentation>
    <aura:description>
        <p>An <code>c:Sample</code> component represents an element that executes an action defined by a controller.</p>
    </aura:description>
    <aura:example name="Sample" ref="c:Sample" label="Using the c:Sample Component">
        <p>This example shows a simple setup of <code>Sample</code>.</p>
    </aura:example>
</aura:documentation>

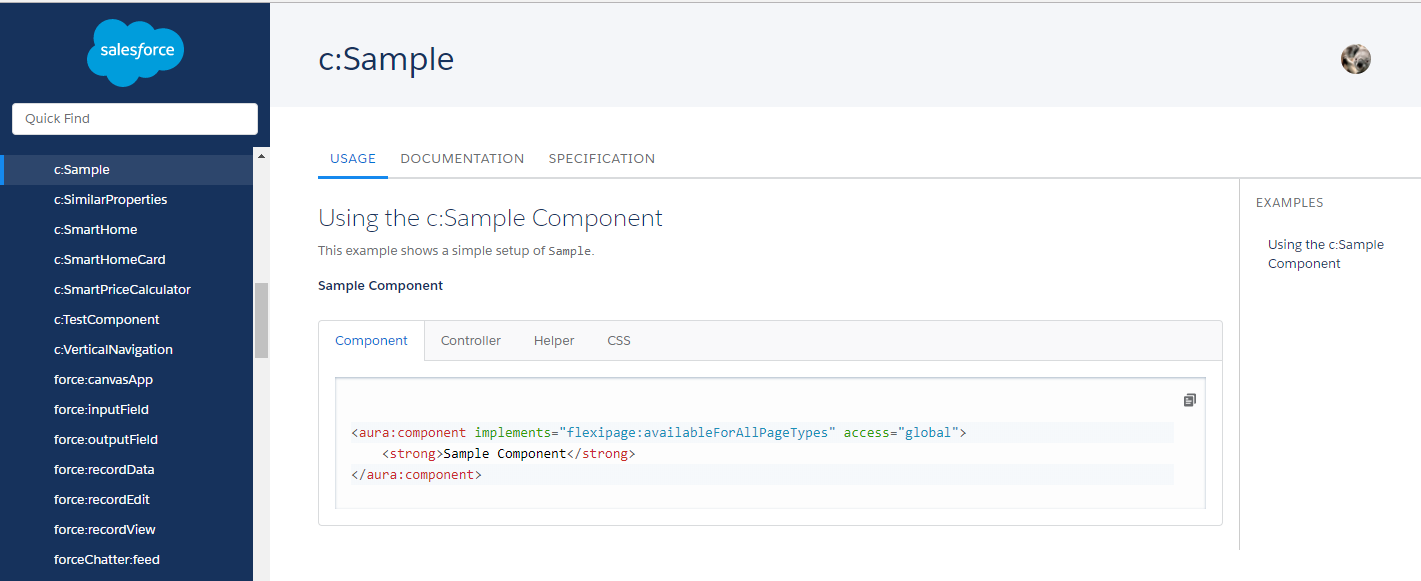
The documentation you create will be available at https://.lightning.force.com/auradocs/reference.app, where is the name of your custom Salesforce domain and in the Component Library at https://.lightning.force.com/componentReference/suite.app where is the name of your custom Salesforce domain.

Disable Lightning Button After Click

In below example I’m creating Lead records from a Lightning Component. On Save button I’ve implemented the logic to hide the button after click.

Apex Controller:

public class SampleAuraController {
    
    @AuraEnabled
    Public static void createLead(Lead objLead){
        try{
            //Insert Lead Record
            insert objLead; 
        }catch(Exception e){
            //get exception message
            throw new AuraHandledException(e.getMessage());
        }
        finally {
        }
    } 
}

Lightning Component:

<!--Sample.cmp--> 
<aura:component controller="SampleAuraController" implements="flexipage:availableForAllPageTypes,force:appHostable">
    
    <!--Declare Attributes-->
    <aura:attribute name="isSpinner" type="boolean" default="false"/>
    <aura:attribute name="objLead" type="Lead" default="{'sobjectType':'Lead', 
                                                        'FirstName': '',
                                                        'LastName': '',
                                                        'Email': '', 
                                                        'Company': ''}"/>
    
    <!--Declare Handlers-->
    <aura:handler event="aura:waiting" action="{!c.handleShowSpinner}"/>
    <aura:handler event="aura:doneWaiting" action="{!c.handleHideSpinner}"/>
    
    <!--Component Start--> 
    <div class="slds-m-around--xx-large">
        <div class="container-fluid">
            <div class="form-group">
                <lightning:input name="fname" type="text" maxlength="50" required="true" label="First Name" value="{!v.objLead.FirstName}" />
            </div>
            <div class="form-group">
                <lightning:input name="lname" type="text" maxlength="50" required="true" label="Last Name" value="{!v.objLead.LastName}" />
            </div>
            <div class="form-group">
                <lightning:input name="emailId" type="email" maxlength="100" required="true" label="Email" value="{!v.objLead.Email}" />
            </div>
            <div class="form-group">
                <lightning:input name="company" type="text" maxlength="50" required="true" label="Company" value="{!v.objLead.Company}" />
            </div>
        </div>
        <br/>
        <lightning:button variant="brand" disabled="{!v.isSpinner}" label="{!v.isSpinner == true ? 'Saving...' : 'Save'}" onclick="{!c.handleLeadSave}" />             
    </div>
    <!--Component End-->
</aura:component>

Lightning JS Controller:

({
    //Handle Lead Save
    handleLeadSave : function(component, event, helper) {
        var objLead = component.get("v.objLead");
        var action = component.get("c.createLead");
        action.setParams({
            objLead : objLead
        });
        action.setCallback(this,function(a){
            var state = a.getState();
            if(state === "SUCCESS"){
                alert('Record is Created Successfully');
            } else if(state === "ERROR"){
                var errors = action.getError();
                if (errors) {
                    if (errors[0] && errors[0].message) {
                        alert(errors[0].message);
                    }
                }
            }else if (status === "INCOMPLETE") {
                alert('No response from server or client is offline.');
            }
        });       
        $A.enqueueAction(action);
    },
    
    //Call by aura:waiting event  
    handleShowSpinner: function(component, event, helper) {
        component.set("v.isSpinner", true); 
    },
    
    //Call by aura:doneWaiting event 
    handleHideSpinner : function(component,event,helper){
        component.set("v.isSpinner", false);
    }
})

Output:

Craete Record Using Lightning Data Service

Lightning Data Service (LDS) is to serve as the data layer for Lightning. It is similar like Standard Controllers in Visualforce Page.

Advantages of Lightning Data Service:

  • Lightning Data Service allows to load, create, edit, or delete a record without requiring Apex code and SOQL query.
  • Lightning Data Service handles sharing rules and field-level security.
  • Records loaded in Lightning Data Service are cashed and shared across all components.
  • When one component updates a record, the other component using it are notified.
  • Lightning Data Service supports offline in Salesforce1.

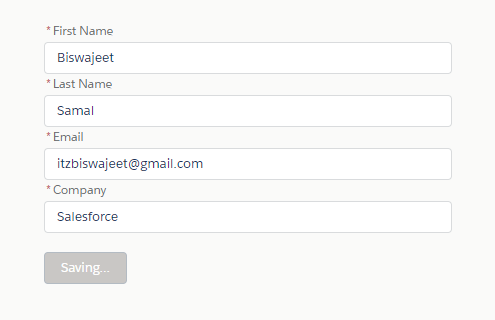
In below example I’m creating Lead object record using Lightning Data Service. By using the new base lightning component lightning:recordEditForm, we can create and edit records, without custom Javascript and Apex code.

Lightning Component:

<!--Sample.cmp--> 
<aura:component implements="flexipage:availableForAllPageTypes,force:appHostable">
    
    <!--Component--> 
    
<div class="slds-m-around--xx-large">
        <lightning:card title="Lead" iconName="standard:lead" class="slds-p-around_medium">
            <lightning:recordEditForm aura:id="leadCreateForm" objectApiName="Lead" onsuccess="{!c.handleOnSuccess}">
                <lightning:messages />
                
                
<div class="slds-grid">
                    
<div class="slds-col slds-size_1-of-2 slds-p-around_medium">
                        <lightning:inputField fieldName="FirstName"></lightning:inputField>
                    </div>

                    
<div class="slds-col slds-size_1-of-2 slds-p-around_medium">
                        <lightning:inputField fieldName="LastName"></lightning:inputField>
                    </div>

                </div>


<div class="slds-grid">
                    
<div class="slds-col slds-size_1-of-2 slds-p-around_medium">
                        <lightning:inputField fieldName="Email"></lightning:inputField>
                    </div>

                    
<div class="slds-col slds-size_1-of-2 slds-p-around_medium">
                        <lightning:inputField fieldName="Phone"></lightning:inputField>
                    </div>

                </div>


<div class="slds-grid">
                    
<div class="slds-col slds-size_1-of-2 slds-p-around_medium">
                        <lightning:inputField fieldName="Company"></lightning:inputField>
                    </div>

                </div>

                
                <lightning:button type="submit" label="Save" variant="brand"/>
            </lightning:recordEditForm>
        </lightning:card>
    </div>

</aura:component>

Lightning JS Controller:

({
    handleOnSuccess : function(component, event, helper) {
        var toastEvent = $A.get("e.force:showToast");
        toastEvent.setParams({
            "title": "Success!",
            "message": "The record has been created successfully.",
            "type": "success",
            "mode": "pester"
        });
        toastEvent.fire();
        $A.get("e.force:refreshView").fire();
    }
})

Multi Select Picklist in Lightning Component

We can use lightning:dualListbox component to show multi select picklist field values. lightning:dualListbox component represents two side-by-side list boxes. Select one or more options in the list on the left. Move selected options to the list on the right. The order of the selected options is maintained and we can reorder options.

Here in below example I’m using a Custom object “Book”, and the multi select picklist field “Genre” of “Book” object.
Apex Class:

public class SampleAuraController {
    
    @AuraEnabled
    public static List <String> getPiklistValues() {
        List<String> plValues = new List<String>();
        
        //Get the object type from object name. Here I've used custom object Book.
        Schema.SObjectType objType = Schema.getGlobalDescribe().get('Book__c');
        
        //Describe the sObject using its object type.
        Schema.DescribeSObjectResult objDescribe = objType.getDescribe();
        
        //Get the specific field information from field name. Here I've used custom field Genre__c of Book object.
        Schema.DescribeFieldResult objFieldInfo = objDescribe.fields.getMap().get('Genre__c').getDescribe();
        
        //Get the picklist field values.
        List<Schema.PicklistEntry> picklistvalues = objFieldInfo.getPicklistValues();
        
        //Add the picklist values to list.
        for(Schema.PicklistEntry plv: picklistvalues) {
            plValues.add(plv.getValue());
        }
        plValues.sort();
        return plValues;
    }
}

Lightning Component:

<!--MultiSelectPicklist.cmp-->
<aura:component controller="SampleAuraController">
    
    <!--Declare Event Handlers--> 
    <aura:handler name="init" action="{!c.doInit}" value="{!this}" description="Call doInit function on component load to get picklist values"/>
    
    <!--Declare Attributes-->
    <aura:attribute name="GenreList" type="List" default="[]" description="Genre Picklist Values"/>
    <aura:attribute name="selectedGenreList" type="List" default="[]" description="Selected Genre Picklist Values"/>
    
    <div class="slds-m-around_xx-large">
        <lightning:dualListbox aura:id="selectGenre"
                               name="Genre"
                               label="Select Genre" 
                               sourceLabel="Available Genre" 
                               selectedLabel="Selected Genre" 
                               options="{!v.GenreList }"
                               value="{!v.selectedGenreList}"
                               onchange="{!c.handleGenreChange}"/>
        <lightning:button variant="brand" label="Get Selected Genre" onclick="{!c.getSelectedGenre}" />
    </div>
</aura:component>

Lightning Component JS Controller:

({
    doInit: function(component, event, helper) {
        var action = component.get("c.getPiklistValues");
        action.setCallback(this, function(response) {
            var state = response.getState();
            if (state === "SUCCESS"){
                var result = response.getReturnValue();
                var plValues = [];
                for (var i = 0; i < result.length; i++) {
                    plValues.push({
                        label: result[i],
                        value: result[i]
                    });
                }
                component.set("v.GenreList", plValues);
            }
        });
        $A.enqueueAction(action);
    },
    
    handleGenreChange: function (component, event, helper) {
        //Get the Selected values   
        var selectedValues = event.getParam("value");
        
        //Update the Selected Values  
        component.set("v.selectedGenreList", selectedValues);
    },
    
    getSelectedGenre : function(component, event, helper){
        //Get selected Genre List on button click 
        var selectedValues = component.get("v.selectedGenreList");
        console.log('Selectd Genre-' + selectedValues);
    }
})

Output: