Configure the Google reCAPTCHA and get the Site Key & Secret Key:
Login to Google reCAPTCHA
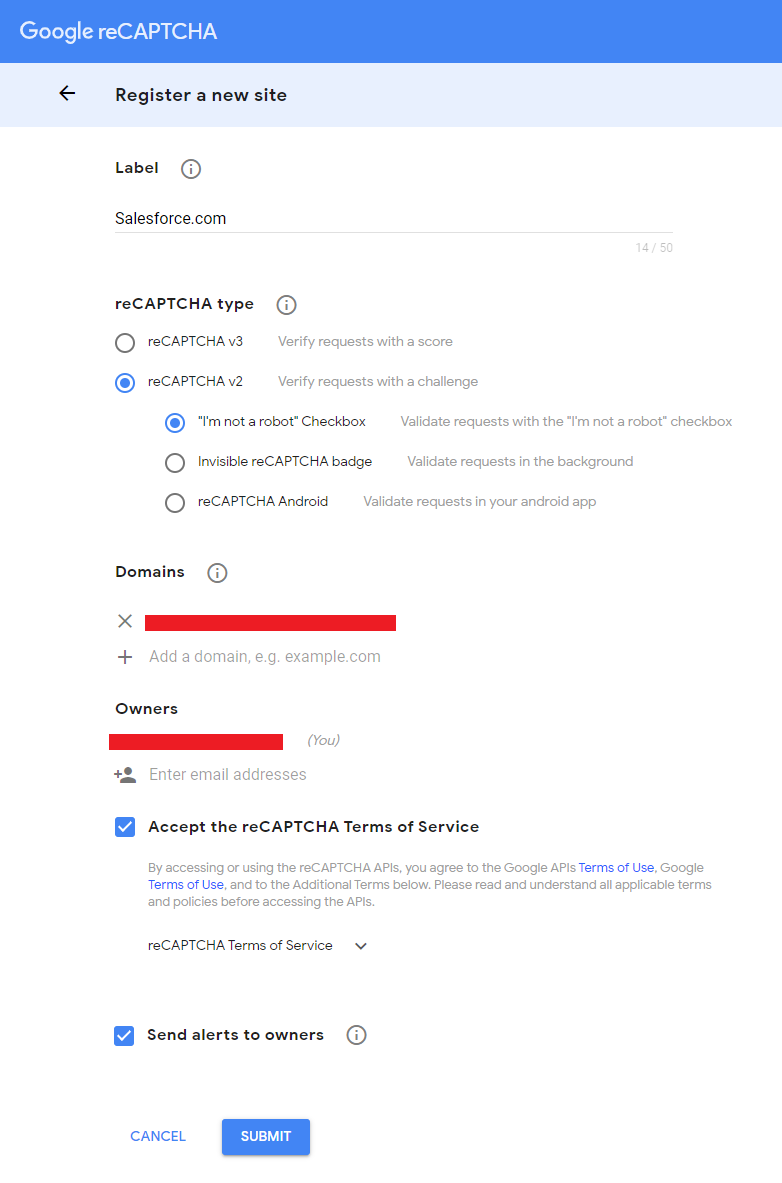
Register a new site
Add Label e.g. Salesforce.com
Select reCAPTCHA type “reCAPTCHA v2”
Select “I’m not a robot” Checkbox option.
Add a domain e.g. yourorgurl.com
Accept the reCAPTCHA Terms of Service
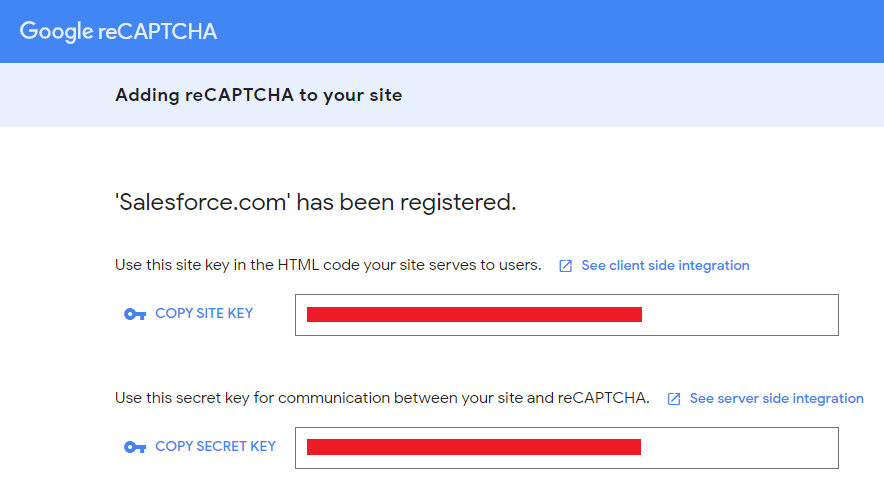
Submit and get the Site Key & Secret Key
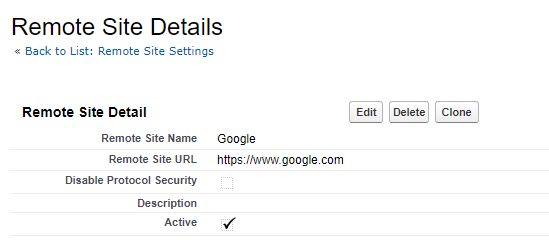
Remote Site Settings:
Create Remote Site settings for google.com site URL
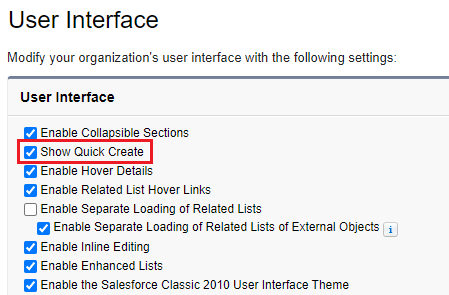
Note: Make sure your org “Show Quick Create” is enabled.
Go to Setup | User Interface | Select the checkbox of “Show Quick Create” | Click on Save button at the bottom.
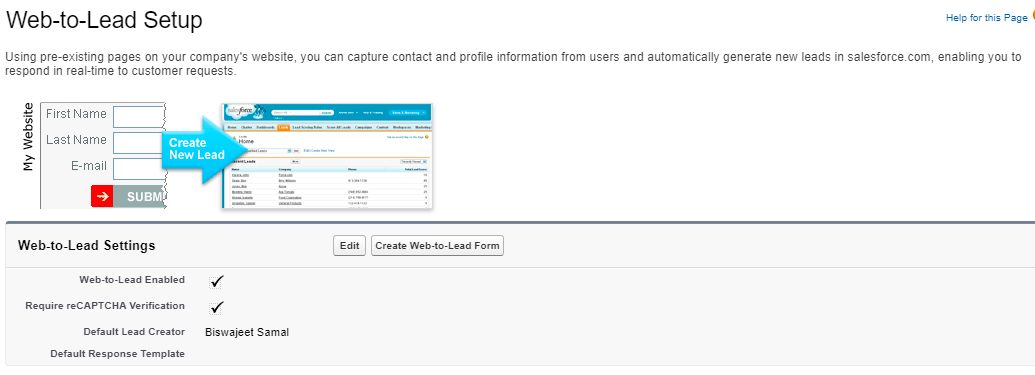
Setup Web-to-Lead:
1. Go to Setup | Leads | Web-to-lead | Select the checkbox of “Web-to-Lead Enabled” | Select the checkbox of “Require reCAPTCHA Verification” | Select Default Lead Creator | Click on Save button at the bottom.
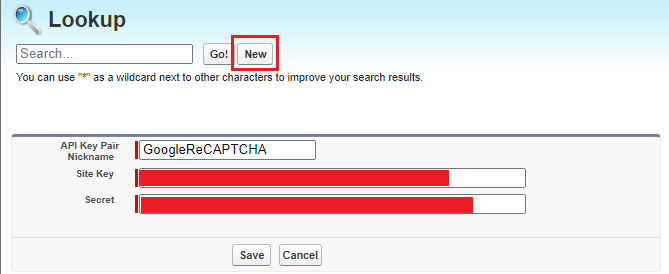
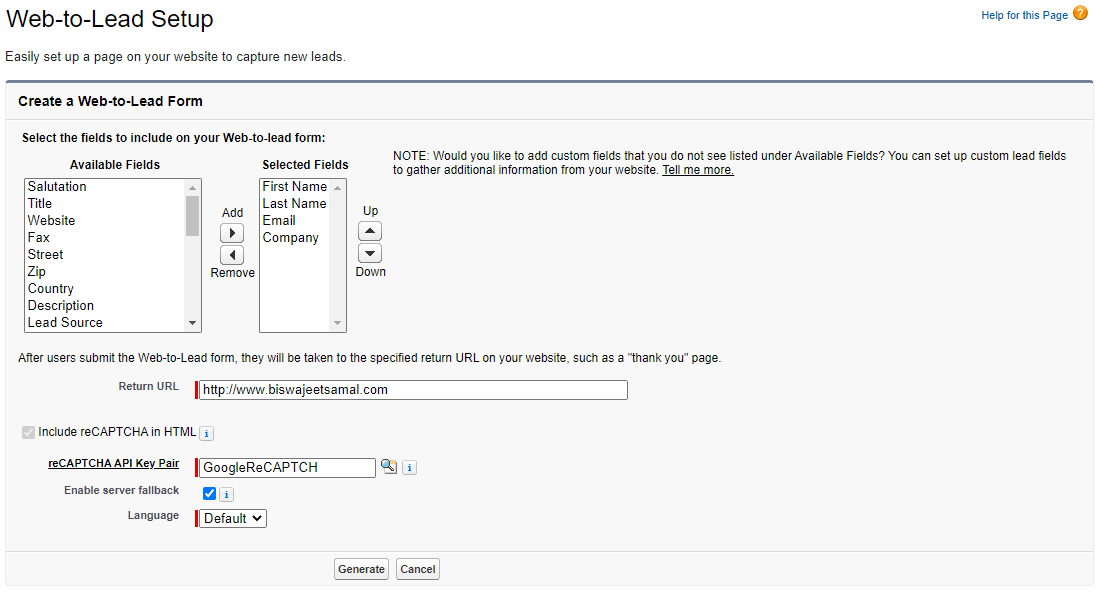
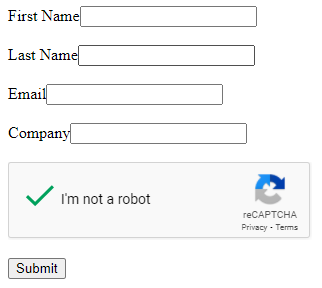
2. Click on “Create Web-to-Lead Form” button | Select Lead fields you want to add on the form | Give the redirect URL | Click the lookup icon to select “reCAPTCHA API Key Pair”.
3. In the popup window, Click on the New Button | Enter the “API Key Pair Nickname” of your choice | Enter Google reCAPTCHA Site Key | Enter Google reCAPTCHA Secret Key | Click on Save.
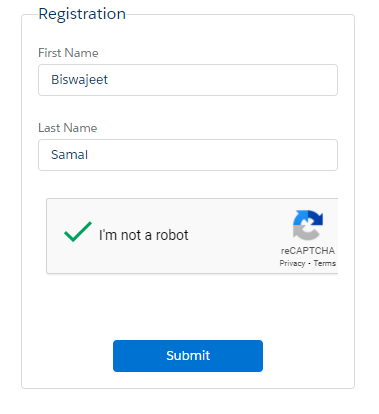
4. Click on Generate button, and you will get the HTML code ready to put on your website.
Salesforce stores default community to a User Profile in NetworkAffinity object. Using apex we cannot insert the default community to a User Profile. We can make a REST API call to add default community to a User Profile.
Sample Code:
//Get Endpoint URL
String endpointURL = URL.getSalesforceBaseUrl().toExternalForm()+'/services/data/v48.0/sobjects/NetworkAffinity';
HttpRequest req = new HttpRequest();
req.setEndpoint(endpointURL);
req.setMethod('POST');
req.setHeader('Authorization', 'Bearer ' + UserInfo.getSessionId());
req.setHeader('Content-Type', 'application/json;charset=UTF-8');
//Add Community Id as NetworkId and Profile/Permission Id
req.setBody('{"NetworkId":"0DB1I000000TP59WAG","ProfileId":"00e1I000001uXJUQA2"}');
Http http = new Http();
HttpResponse response = http.send(req);
System.debug('response-' + response);
Note: Add your salesforce base URL as remote site settings and then execute above code in developer console anonymous window.
This website uses cookies to improve your experience. We'll assume you're ok with this, but you can opt-out if you wish.AcceptReject